Sunday, December 7, 2014

YSL Black Opium Campaign

A campaign I have chosen to look at is the YSL Black Opium perfume campaign. This look is very sultry and dark.

Two things I really like about the look is that the hair has been left quite natural and messy. I also like how the focus of the eye make-up is under the eye rather than on the lid. I also like the full brows.

If I were to recreate this look I would start by using a full coverage foundation similar to Mac's studio fix however I would still want to keep the dewy look the skin has in the campaign so therefore I would mix a highlighter similar to Benefit's 'girl meets pearl' into my foundation. For blush I would use a brownish plum tone and apply this just to the outside of the cheeks. I would then fill in the brows using the derma colour pallet to give the full brows displayed in the campaign. I would then apply a shimmery taupe colour to the eyelid for this I would use the colour suspect from the urban decay naked 2 pallet.

I can see a clear a clear link to catwalk looks on fashion weeks. During Paris haute couture fashion week for Spring/Summer 2014 Chanel had models sporting a winged liner with silver glitter placed under the eye. This look was also featured in Nicki Minaj's campaign for Mac. I can also see a link to the Burberry look I have researched in that they both feature a strong colour on the eyes and both have eye-shadow placed under the eyes.I would then line the top lash line with a liquid liner. I would probably use my favourite which is the l'oreal super liner perfect slim. I would then line the waterline and tightline right into the corner of the eyes using a jet black pencil liner like Rimmel's scandal eyes eye liner. For the black under the eyes I would start by lining just under the eye with a pencil then using a brush to blend it downward with a pencil brush. If I felt it needed intensifying I would then add a matte black eyeshadow like Urban Decay's Blackout from the naked 2 pallet to this and blend again. To recreate the lips in this look I would use a very light coat of Mac's 'please me' lipstick which is a matte dusky pink shade.

Images from and Elle magazine December 2014 issue


Campaign
Paris Fashion Week

Miss Dior Campaign

The next campaign I looked at was the Miss Doir perfume campign featuring Nathalie Portman this look contrasts massively to YSL campaign in that it features a very simplistic natural pretty make-up.Of the two campaigns this is the look I favour.

If I were to recreate this look I would use a light coverage foundation with a satin finish as the skin does not look very dewy, A product that would work well for this would be the Estee Lauder double work light. If I were to use any eye shadows I would use matte shadows in nudes tones, using a colour similar to my models natural skin tone on the eyelid and a slightly darker colour in the socket line. I may also use a slightly paler colour on the brow bone and inner corner.I would use a fluffy brush to blend these really well in order to try and achieve a look of no eye-shadow. I does look as if Natalie has some eye-liner on her top lash line. To me this doesn't look as solid as a liquid liner it also has a matte finish which leads me to believe either a gel liner or black eye-shadow has been used. If I were creating this liner I would use the Inglot gel liner. Nathalie's lashes don't look to have lots of mascara on and the lashes look lengthened rather than volumised for this reason I would apply 1 or 2 coats of a lengthening mascara similar to l'oreal's telescopic mascara. For the blush I would choose a matte pale pink blusher like Benefit's Dandelion.The lips in this campaign look to be very natural and therefore I would either leave them natural and just use a tiny bit of lip balm. If I were to use a colour I would select a nude to suit my models skin tone similar to Mac's shy girl.

I can see that this has been heavily influenced by fashion as clean fresh looking skin has all over the catwalks in recent years.

Danny Defreitas

A hair stylist I have decided to look at for fashion work is Danny Defreitas
'Danny's focused expertise in hair and make-up, assures his suitability for working in the many sectors within the industry such as TV, Film, Theatre, Events, Celebrities & Fashion.
He has come a long way in a short space of time, because of his approach that no job is too big or too small, and his willingness to grow and learn through creative enterprise.
Danny’s reputation is built on his skills for creating beautiful highly individualistic hair & make up, without compromising the clients desired look. Heavily influenced by the arts, theatre and media industries, his speedy expertise always aims to deliver client expectations and exceed them.
His philosophy is that a great look lies in creating innovative, signature, and wearable looks unique to the individual. He believes the best thing about working with in this field is that it’s ever evolving, having the confidence to follow your passion to create something different. His ambition is to bring new standards in trying to achieve unparalleled perfection coupled with ingenuity by balancing ideas through art, nature and science.'
Written by Amalia Rex
Fashion shows that Defreitas has worked on include;
-VELSVOIR & OCTOBER HOUSE - Head of Hair & Make Up - The Ivy Club - LC:M SS14
-RIHANNA FOR RIVERISLAND - London Fashion Week AW13                                                       
-RIHANNA FOR RIVER ISLAND - London Fashion Week SS13 
-EMILIA WICKSTEAD - London Fashion Week AW14
-SORAPOL - London Fashion Week AW14
-M&S - Somerset House - London Fashion Weekend Catwalk AW13
-AHNDE - London Fashion Week SS14 - Head of Hair
-HACKETT LONDON - LC:M A/W 2013
-RAKE - LC:M A/W 2013
-JAMES LONG - LC:M A/W 2013
-FASHION LIVES - Westfield London Catwalk Show
-BIG FASHION WARDOBE – Westfield London Catwalk Show
-CAR BOOTIQUE SHOW – Westfield London Catwalk Show
There is a clear influence from Defreitas in the fashion world. He has created blunt cuts, full bodied blow dries a wet look hair styles all of which has been featured in catwalks recently. 

Kevyn Aucoin

An artist who inspires me is Kevyn Aucoin (14th Febuary 1962- 7th May 2002) 

Aucoin was born and grew up in Louisiana to parents Isidore Adrian Aucoin and Thelma Suzanne Melancon, who adopted him as an infant. He had three siblings. Sisters Carla and Kim who he would frequently do make-up for growing up and a brother Keith. 

Being male and interested in make-up caused hard ship for Aucoin growing up in the south of america during the 1970's. During highschool bullying became so bad that Aucoin eventually left school prior to graduation. 

In 1982 after enrolling in beauty school Aucoin moved from Lafayette ,where women were uncomfortable with a man doing their make-up, to Baton Rouge in the hopes of starting a career in make-up. However prejudice was still very much alive in Baton Rouge and after being assaulted by a security guard and fearing for his life Aucoin moved again to New York. 

Aucoin's career went from strenghth to strenghth while living in New York. After working on test models unpaid to build his portfolio he was discovered by vougue. Over the next year and a half Aucoin worked daily with vougue photographer Steve Meisel. 

in 1984 Revlon then collaborated with Aucoin to create their 'Nakeds' line. The first line based purley on skintones. This line was groundbreaking and an opposition to other cosmetics available at the time. Prior to this there were make-up lines for white women and others for black women. Aucoin work to design foundations for all skin tones ans created foundations with a yellow undertone whereas before undertones had always been pink and peach.

A year before his death in 2001 Aucoin launched his own brand 'Kevyn Aucoin Beauty'. This line contains products that use 'his motto that it was far more important to help a woman feel beautiful no matter what, and that make-up was just his tool for helping her discover herself'.
He has also written two bestselling books 'making faces' and 'face forward'.

Kevyn Aucoin was one of the most sought after make-up artists during his time often being booked for months in advanced and being able to request up to $6000 per day. His influence is still prevalent in the fashion industry today. He also inpires the make-up artists of today Pat McGrath and Charlotte Tilbury.


Kevin Aucoin Making Faces


Eyeliner Techniques

Today we looked at eyeliner techniques.
We first discussed different products
The first thing we talked about was gel liner. Gel liner used to just used on catwalks and then went into the consumer market. The first brands which carried gel liner were Mac and Bobbi Brown, these however are not the best ones on the market as they dry to a dark grey not black and smudge very easily as they are not waterproof.
We also talked about cake liner which comes as a solid and you add water to achieve the consistency you feel comfortable working with. The screen face or Illamasqua are best ones on the market but Aqua colour works just as well. Cake liner is also a good as it is hygienic.

We then moved on to talking about brushes. Our teacher recommended the C White acrylic art brushes in size 1. These are good as they are very small and synthetic so they hold product well and don’t loose their shape. Mac also sell two liner brushes these are the 209 and the 208 however these are a bit thick. Using an angled brush also works well for liner and the Mac 266 middle sized angle brush works well

We then moved onto the demonstration and trying out the look ourselves
-To start off I tried to make sure I didn’t mix my black aqua colour which I was using as a dupe for cake  liner too thin otherwise it would have run down the face causing a big mess.
-I started in centre of the eye and moved outward to the end. To get right in to the inner corner I got my model to look downwards and to the side. I Tried to make sure I got right in to base of the lashes and that the line was solid and continuous
-To create the flick I stretched the eye from the brow bone and lifted liner from there. My teacher showed us a technique of pressing the brush down then lifting to create the  perfect flick. The consistency of my liner was a bit thick to do this so I had to drag the brush and draw the flick instead.
-I then repeated the process on the other eye using gel liner. With my gel liner I used an angled brush and flattened the brush product. I defiantly preferred working with the cake line as I found the gel dragged a bit.
-I finished my liner too soon therefore my flick was in the wrong place and didn’t really show up when my model opened her eyes.
We then moved on to making the look high fashion
-To start this process I cleansed, toned and moisturise the skin I then used my le maquillage Morag Ross pallet and tried to create a dewy look to the skin. I mixed my base to pale at first so then had to add a darker layer on top resulting in a heavier coverage than I originally intended to have.
-I then concealed under the eyes with my derma colour palette using d32 then adding some foundation to neutralise the colour
-My teacher used Mac’s pearl cream colour base to highlight aping the product to the cheek bones, brow bones, cupids bow and nose then blended it in gently with same brush that was used for foundation. I didn't have this product so instead I used Vanilla pigment form Mac
-I then set everything with translucent powder
-I used my derma colours to fill the brows
-Our teacher then showed us two examples of a graphic liner look. The first one she extending liner and pulling it into the crease. She did this in one movement to get shape the perfect then perfected it where necessary. She then showed us how you can soften the liner on this look by mixing a grey and brown shadow and pulling inward from where the liner had been placed. The second look she demonstrated was a dot under the pupil. For my look I tried to created a triple wing. It was not very successful as the brush I had did not allow me to be very precise so it was not as harsh as I wanted and the eyes were uneven
-To finish the look I did some subtle contouring and added a bold pink colour to the lips

I don’t think this look was at all successful and I need to work on my symmetry, colour matching and making a nice clean lip.

I re-created this look at home and my lip was much better but my symmetry on the eye-liner still needs work.


Smokey Eye

Today's lesson focused on creating the perfect smokey eye. We used a different technique than I am used to.

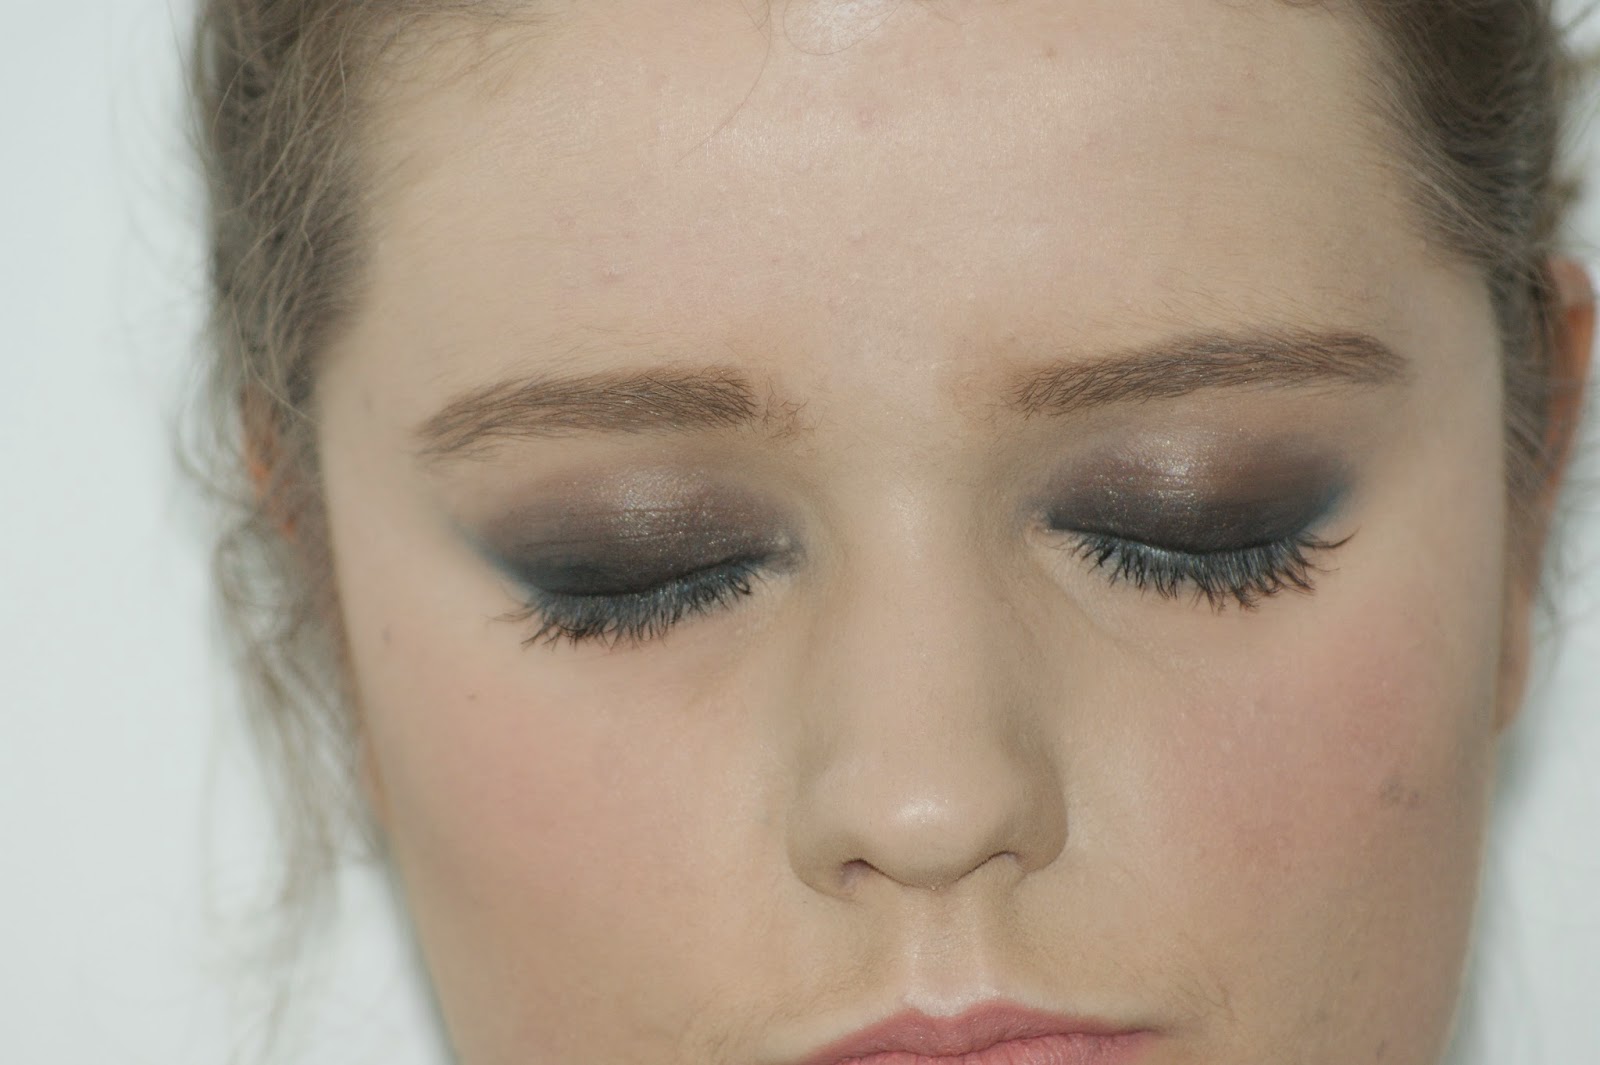
-I started by using Mac's blacktrack gel eye liner and applying this all over the lid then using a eye-shadow brush to blend this upwards into the crease so that there were no harsh lines.At first I took this a little bit too high so I had to remove some this made the look appear more skilful rather than messy.
-I then mixed the Mac eye-shadows in the colours 'Brun' and 'Satin Taupe' and buffed these into the crease to soften the look ans give the look a gradual colour gradient rather than just going from light straight to dark.
-I then added some of the Mac eye-shadow in the colour 'Shroom' and put this on the brow bone to add some highlight to this area.
-The next thing I did was to add  black eye-liner to the lash line as when buffing the backtrack in previously it lost some of the impact by the lash line. -The last step was to add some liner to the water line and bottom lash line so that the look was balanced I also buffed this in so that it was a soft smokey line and not harsh.

Overall I think my look was sucsessful but I would have benefitted from building up the backtrack on the eyelid as this ended up being slightly paler than our teachers demonstartion.

Contouring Full-Coverage

I practised contouring with a full coverage on myself at home
-I started by building the base a little heavier and don’t use any mixing medium with my foundation. I also used a different product. Rather than using my La Macquillage palette I used the Mac studio fix foundation.
-I then use the d32 colour again to neutralise any blue tones under my eyes and blended this in using my foundation.
-Our teacher the suggested that we use the derma colour for highlighter and contour.
-Unfortunatly there is not a colour fair enough for me to use as highlighter in my derma colour pallet so I used a very pale tone from my super colour pallet instead. I thibk this was a good alternative and did add the right shade for highlighting to my face. I applied this under my eye and up my cheekbone.
-To contour I mixed the colours D8 D11 and D13 together and applied this in the hollows of my cheek. At first I applied this a bit too thick so it was bleeding into the highlighter after correcting this and making the line thinner it looked much better. To blend this I used my foundation brush which still had a tiny bit of product on it so it pulled contouring in with the base nicely. Meaning there were no strong lines on the face.
-I then set everything Mac’s Prep and prime powder
-My teacher added a bit of Mac’s vanilla pigment over the exsisting highlight. I do not have this product in my kit or personal make-up so I used Mac’s mineralise skin finish in lightscapade.
-To pull the look together I then filled in my brows and added some blusher and lipstick
Overall I think this look was successful but I feel that I need to be careful not to apply too much product and make sure the contour is symmetrical.
During front veiw

During side veiw

Final look front veiw

Final look side view