Sunday, December 7, 2014

Eyeliner Techniques

Today we looked at eyeliner techniques.
We first discussed different products
The first thing we talked about was gel liner. Gel liner used to just used on catwalks and then went into the consumer market. The first brands which carried gel liner were Mac and Bobbi Brown, these however are not the best ones on the market as they dry to a dark grey not black and smudge very easily as they are not waterproof.
We also talked about cake liner which comes as a solid and you add water to achieve the consistency you feel comfortable working with. The screen face or Illamasqua are best ones on the market but Aqua colour works just as well. Cake liner is also a good as it is hygienic.

We then moved on to talking about brushes. Our teacher recommended the C White acrylic art brushes in size 1. These are good as they are very small and synthetic so they hold product well and don’t loose their shape. Mac also sell two liner brushes these are the 209 and the 208 however these are a bit thick. Using an angled brush also works well for liner and the Mac 266 middle sized angle brush works well

We then moved onto the demonstration and trying out the look ourselves
-To start off I tried to make sure I didn’t mix my black aqua colour which I was using as a dupe for cake  liner too thin otherwise it would have run down the face causing a big mess.
-I started in centre of the eye and moved outward to the end. To get right in to the inner corner I got my model to look downwards and to the side. I Tried to make sure I got right in to base of the lashes and that the line was solid and continuous
-To create the flick I stretched the eye from the brow bone and lifted liner from there. My teacher showed us a technique of pressing the brush down then lifting to create the  perfect flick. The consistency of my liner was a bit thick to do this so I had to drag the brush and draw the flick instead.
-I then repeated the process on the other eye using gel liner. With my gel liner I used an angled brush and flattened the brush product. I defiantly preferred working with the cake line as I found the gel dragged a bit.
-I finished my liner too soon therefore my flick was in the wrong place and didn’t really show up when my model opened her eyes.
We then moved on to making the look high fashion
-To start this process I cleansed, toned and moisturise the skin I then used my le maquillage Morag Ross pallet and tried to create a dewy look to the skin. I mixed my base to pale at first so then had to add a darker layer on top resulting in a heavier coverage than I originally intended to have.
-I then concealed under the eyes with my derma colour palette using d32 then adding some foundation to neutralise the colour
-My teacher used Mac’s pearl cream colour base to highlight aping the product to the cheek bones, brow bones, cupids bow and nose then blended it in gently with same brush that was used for foundation. I didn't have this product so instead I used Vanilla pigment form Mac
-I then set everything with translucent powder
-I used my derma colours to fill the brows
-Our teacher then showed us two examples of a graphic liner look. The first one she extending liner and pulling it into the crease. She did this in one movement to get shape the perfect then perfected it where necessary. She then showed us how you can soften the liner on this look by mixing a grey and brown shadow and pulling inward from where the liner had been placed. The second look she demonstrated was a dot under the pupil. For my look I tried to created a triple wing. It was not very successful as the brush I had did not allow me to be very precise so it was not as harsh as I wanted and the eyes were uneven
-To finish the look I did some subtle contouring and added a bold pink colour to the lips

I don’t think this look was at all successful and I need to work on my symmetry, colour matching and making a nice clean lip.

I re-created this look at home and my lip was much better but my symmetry on the eye-liner still needs work.


Smokey Eye

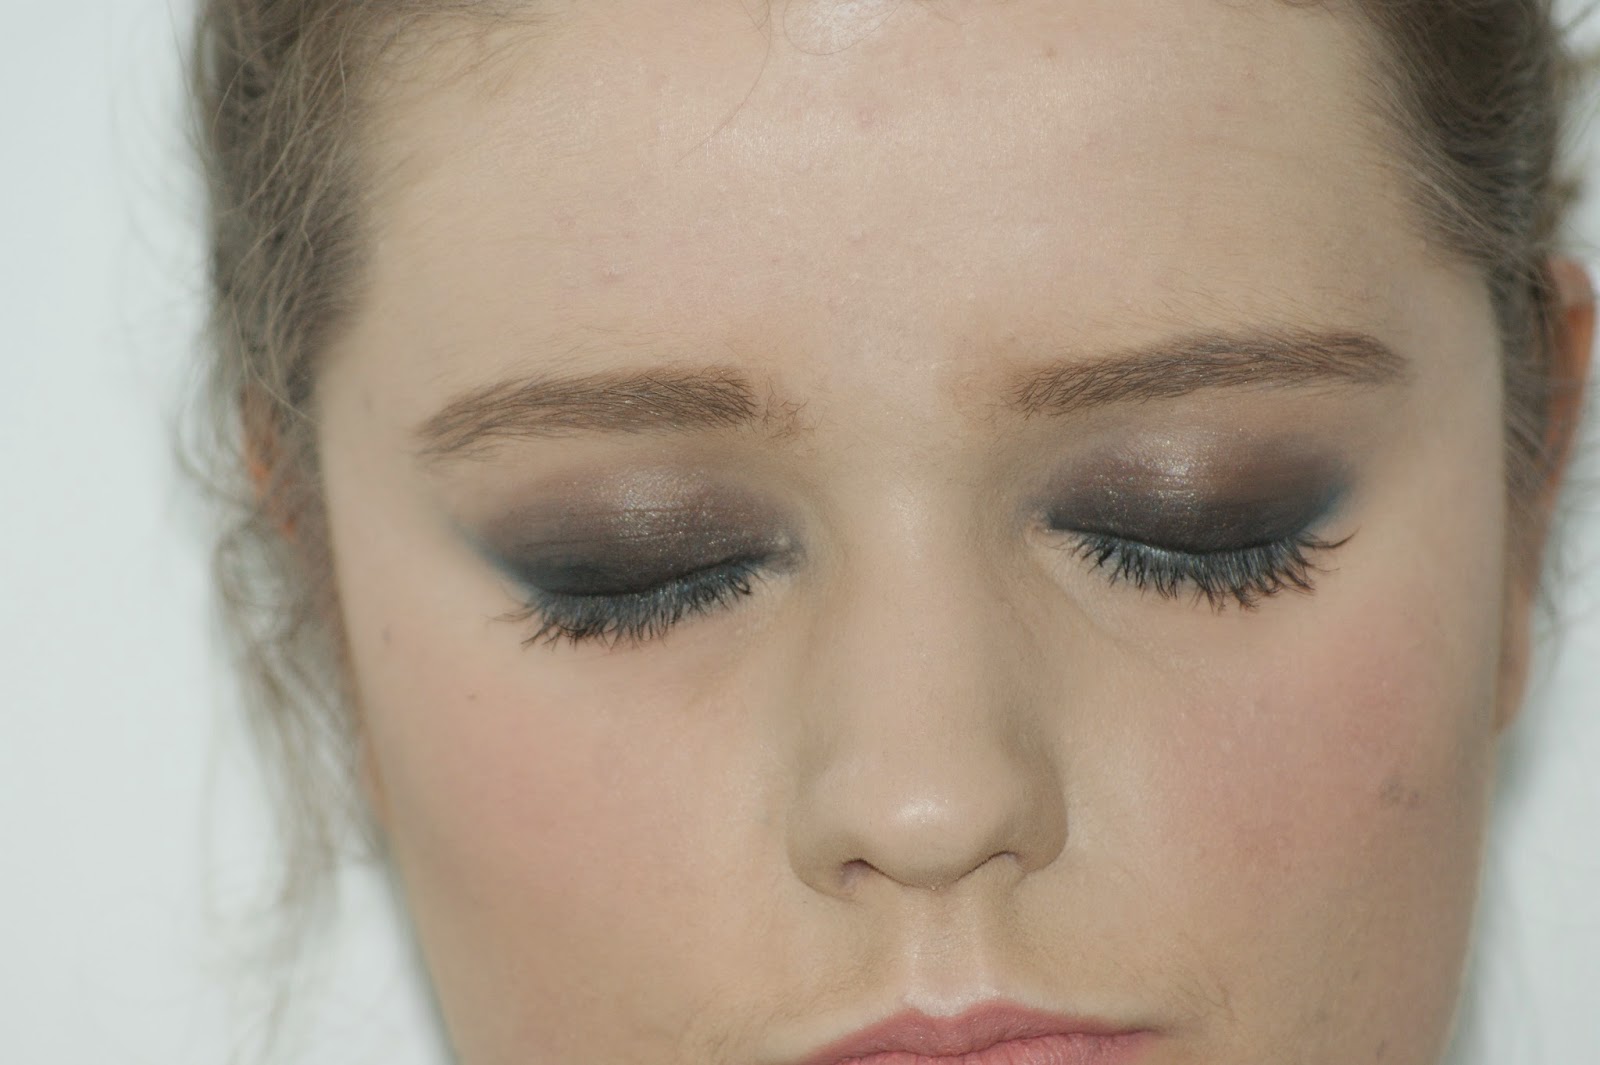
Today's lesson focused on creating the perfect smokey eye. We used a different technique than I am used to.

-I started by using Mac's blacktrack gel eye liner and applying this all over the lid then using a eye-shadow brush to blend this upwards into the crease so that there were no harsh lines.At first I took this a little bit too high so I had to remove some this made the look appear more skilful rather than messy.
-I then mixed the Mac eye-shadows in the colours 'Brun' and 'Satin Taupe' and buffed these into the crease to soften the look ans give the look a gradual colour gradient rather than just going from light straight to dark.
-I then added some of the Mac eye-shadow in the colour 'Shroom' and put this on the brow bone to add some highlight to this area.
-The next thing I did was to add  black eye-liner to the lash line as when buffing the backtrack in previously it lost some of the impact by the lash line. -The last step was to add some liner to the water line and bottom lash line so that the look was balanced I also buffed this in so that it was a soft smokey line and not harsh.

Overall I think my look was sucsessful but I would have benefitted from building up the backtrack on the eyelid as this ended up being slightly paler than our teachers demonstartion.

Contouring Full-Coverage

I practised contouring with a full coverage on myself at home
-I started by building the base a little heavier and don’t use any mixing medium with my foundation. I also used a different product. Rather than using my La Macquillage palette I used the Mac studio fix foundation.
-I then use the d32 colour again to neutralise any blue tones under my eyes and blended this in using my foundation.
-Our teacher the suggested that we use the derma colour for highlighter and contour.
-Unfortunatly there is not a colour fair enough for me to use as highlighter in my derma colour pallet so I used a very pale tone from my super colour pallet instead. I thibk this was a good alternative and did add the right shade for highlighting to my face. I applied this under my eye and up my cheekbone.
-To contour I mixed the colours D8 D11 and D13 together and applied this in the hollows of my cheek. At first I applied this a bit too thick so it was bleeding into the highlighter after correcting this and making the line thinner it looked much better. To blend this I used my foundation brush which still had a tiny bit of product on it so it pulled contouring in with the base nicely. Meaning there were no strong lines on the face.
-I then set everything Mac’s Prep and prime powder
-My teacher added a bit of Mac’s vanilla pigment over the exsisting highlight. I do not have this product in my kit or personal make-up so I used Mac’s mineralise skin finish in lightscapade.
-To pull the look together I then filled in my brows and added some blusher and lipstick
Overall I think this look was successful but I feel that I need to be careful not to apply too much product and make sure the contour is symmetrical.
During front veiw

During side veiw

Final look front veiw

Final look side view 

Catwalk Lip

In today's lesson we looked at creating a catwalk lip. This look features a black lip where the natural lip shape is altered to give it a very dramatic cupids bow.
-To start creating this look I tried to selected concealer close to my models skin tone and apply this to top of cupid’s bow in order to block out the natural lip shape. I think the colour I selected was probably a bit too yellow which meant I had to work a bit harder to blend it in with the rest if the skin.
-I then set this with a translucent powder. I opted for the Ben Nye powder in fair.
-Using Mac's balcktrack gel eyeliner I then outline where the natural cupids bow was to give me a guide and then drew in an exaggerated bow. I think the bow I created was a good shape and fairly symmetrical.
-I then moved on to fill in bottom lip and for this I kept the natural shape when I first did this the shape I created was quite wobbly and not very clean looking. I later fixed this.
-I then moved on to fill in corners and centre of the lips so that the pink tone of the natural lip  didn't show through as this would have ruined the impact of the look.
-My final check was to make sure edges were nice and sharp I did this by using an angled brush.
-I then put some Vaseline on top of the liner to add shine making sure to be very minimal as otherwise the product would have broken the blacktrack down to further ensure this didn't happen I did not take the Vaseline right to corners of the lips.
Overall I think this look was sucsessful if I were to re-create this I would powder the concealer a bit more as it bled through the balcktrack slightly.

Due to my camera not working I do not have evidence of this look so I re-created it on myself at home.

Adding Texture To Hair

Today's lesson focused on putting texture into hair. This is something that is being done regularly on the catwalk at the moment. There are many ways of adding texture to the hair.
-A crimper can be used to create waves and then back combed to add fullness you can then put up with lots of texture in it.
-Rick racking is another method which is a good way to achieve afro frizz but you do need time to do this. To do this you need to wrap small sections of hair around a pin in a figure of eight then hold straighteners onto the pin you can then let it cool and remove the pin and unravel it which will create an S shaped wave. Alternatively you can leave the pins in and brush them out all at once, this is what will give you afro frizz. With this method a smaller pin will create a tighter curl. This method will create a style that will last all day with spray
-A Crimper is also a good way to create texture this can be used as an alternative to plating hair and holding strighteners over the plait which also works well
-For my look I decided to put the hair in lots of small plaits and apply heat to them. I did this in layers and due to the hair of my head block being do course I didn't need to fasten them with any hair band or grips
-This is not a method I would use again as it was very time consuming and did not create as much texture as I would have liked I feel this may be partly due to the fact that I added too much setting spray to the hair before I did my plaits.Due to the lack of texture in my hair it ended up looking very 90's rather than high fashion.
Adding texture to hair

Texture added

Texture added

Chignon

In today's lesson we looked at creating a textured chignon. This is a look that is often used in fashion and also on the red carpet.
-I started by putting some curl into the hair. I did this by using a small curling wand I wanted my curls to hang downwards so that I could pull all the hair backwards easily and it would sit nicely.My curling went well. The hair had lots of product in from previous classes so therefore the curls held very well. One thing that was a problem was that as I came toward to front of the hair I had previously had a middle parting in the hair and I tried to create a side parting  but I didn't section all of the front of the hair over to the side when curling it meaning I had the effect of two partings in the hair.
-I then moved on to creating the chignon. To do this I started by putting the hair into three sections. I then took the back section of the hair and used this to create the chignon. When I first started trying to create my chignon after I had put the hair in a ponytail I was just focusing on trying to make a shape and fighting what the hair naturally wanted to do. my tutor then showed me that by just pushing the hair you can find where the texture I had created sits and to use that to create my shape. I did after splitting my ponytail into three sections and used the wave of each section to make shape.
-With the front two sections of the hair I created twists going back into the chignon. I then gripped these in place by gripping upwards into the twist to conceal the grip. This looked nice but due to the issues I had with my parting the twists were uneven.
I am very happy with the overall look of my hairstyle but I think it needs some fine tuning and I need to play more attention to detail.
Texture added with curling wand

Final Look from back

Final Look front veiw

Contouring-Light coverage

Today’s lesson focused on contouring. Contouring should be used to enhance the face not alter it.

We talked about products that can be used to highlight. There are many varieties including liquid, cream and powder. To highlight you can use a colour lighter and brighter than the skin tone or something with shimmer
Specific products we discussed were Mac stroke cream this is a cream with some shimmer in that bounces light off the skin it‘s good for photos and other fashion work as it contains silicone so dries quickly however it also blocks pores therefore is not good on a regular basis as it will cause breakouts.
Our teacher also recommended the Revlon photo ready skin lights highlighter this ia also a cream highlighter that comes in a variety of shades and doesn’t  cause the skin to break out and is very affordable.
The Nars orgasm Nars Laguna liquid illuminators are also a good option Laguna works particularly well on darker skin.
Stick illuminators also have cream consistency but often dry to a powder so these are nice for blending in and then have a good staying power
Some more specific products we looked at were the Ben Nye fireworks fantasy wheel, Ben Nye illumineer, Mac silver dust, Mac Vanilla pigment

We then moved on to talking about contour. I learned that contour colour should have grey undertone as this creates shadow I had previously used bronzer to contour with as it is a darker colour but having seen the demo I think that mixing eyeshadows to make a taupe colour works better.

We then created a light coverage with contour
- The first step was to mix a base colour and use fluffy eye shadow brush to cover any imperfections. My model had a very yellow tone to her skin so I struggled mixing a  colour that would match her skin tone well from my La Maquialge Morag Ross pallette. I tried to be as minimal as possible when using the base. I then took d32 just under the eye and reapplied the base over the top.
-I then added some make-up mixer to my base with a ratio of ¼ foundation to ¾ mixer and applyed this all over the skin. After this I set under eye with translucent powder
-For highlighter I patted in a Ben Nye stick foundation with my ring finger to the top of cheekbone, brow bone, nose, cupid’s bow and chin. I think this worked well as I made sure I was light handed when applying it so it gave a soft glow to the skin.I them set everything with powder
-To contour I mixed a grey, a beige and a brown colour from my Ben Nye eyeshadow pallete and applied this very lightly to the hollows of the cheeks, temples and jaw line. I had been a tad heavy handed so I used my foundation brush to help it blend in better. I then used a tiny bit on either side of the nose
-During our teachers demo she groomed and filled her models brows she used the derma pallet to fill brows as this gives natural effect to brow it also doesn’t move due to the waxy consistency and mimics hair. This was something I’d never seen done before but I like the effect that it gave. Unfortunately I ran out of time to do this so I’ll need to work a bit faster next time.
-I then added a tiny bit of Macs vanilla pigment over the top of the existing highlight which enhanced the glow to the skin.
-The last thing I did was use my lipstick pallet to mix a blush colour for my model I chose a pink toned peach shade and applied this with my ring finger I used the same colour on lips which tied the look together nicely.

Unfortunatly I do not have a photo of this look as the camera I used has been stolen.I have re-created the look on myself and used this photo to demonstrate the look.