
Monday, March 9, 2015

Sunday, March 8, 2015
References
N.p., 2015. Web. 10 Jan. 2015.
N.p., 2015. Print.
N.p., 2015. Print.
N.p., 2015. Web. 9 Feb. 2015.
N.p., 2015. Web. 5 Feb. 2015.
Charlotte Tilbury,. 'TOM FORD SS/15 - Charlotte Tilbury'. N.p., 2015. Web. 9 Jan. 2015.
F.TAPE | The Online Fashion Resource,. 'POP Magazine | Taylor Swift Cover | F.TAPE'. N.p., 2013. Web. 9 Feb. 2015.
http://www.yesstudio.co.uk, designed. 'MAP - News – Tyrone Lebon Shoots Pop Magazine Cover Story'. Mapltd.com. N.p., 2015. Web. 18 Jan. 2015.
Slideshare.net,. 'Dazed &Amp; Confused + I-D Magazine Analysis'. N.p., 2014. Web. 9 Jan. 2015.
Ukjournalism.co.uk,. N.p., 2015. Web. 17 Jan. 2015.
Use, Internet. 'Vogue Homme Japan's Lady Gaga Wearing Meat'. OrlandoSentinel.com. N.p., 2014. Web. 3 Feb. 2015.
Vogue UK,. 'Show'. N.p., 2015. Web. 14 Jan. 2015.
Vogue UK,. 'Show'. N.p., 2015. Web. 1 Feb. 2015.
Vogue UK,. 'Show'. N.p., 2015. Web. 1 Feb. 2015.
Vogue UK,. 'Show'. N.p., 2015. Web. 9 Feb. 2015.
Wikipedia,. 'Adele'. N.p., 2015. Web. 1 Feb. 2015.
Wikipedia,. 'Dazed'. N.p., 2015. Web. 19 Jan. 2015.
Wikipedia,. 'Harper's Bazaar'. N.p., 2015. Web. 9 Feb. 2015.
Wikipedia,. 'I-D'. N.p., 2015. Web. 6 Feb. 2015.
Wikipedia,. 'Jennifer Lawrence'. N.p., 2015. Web. 1 Feb. 2015.
Wikipedia,. 'Lady Gaga's Meat Dress'. N.p., 2015. Web. 16 Jan. 2015.
Wikipedia,. 'More Demi Moore'. N.p., 2015. Web. 12 Jan. 2015.
Wikipedia,. 'Nick Knight (Photographer)'. N.p., 2015. Web. 25 Jan. 2015.
Wikipedia,. 'Pat Mcgrath'. N.p., 2015. Web. 1 Feb. 2015.
Wikipedia,. 'Pop (Fashion Magazine)'. N.p., 2015. Web. 8 Jan. 2015.
Wikipedia,. 'Vogue (Magazine)'. N.p., 2015. Web. 1 Feb. 2015.


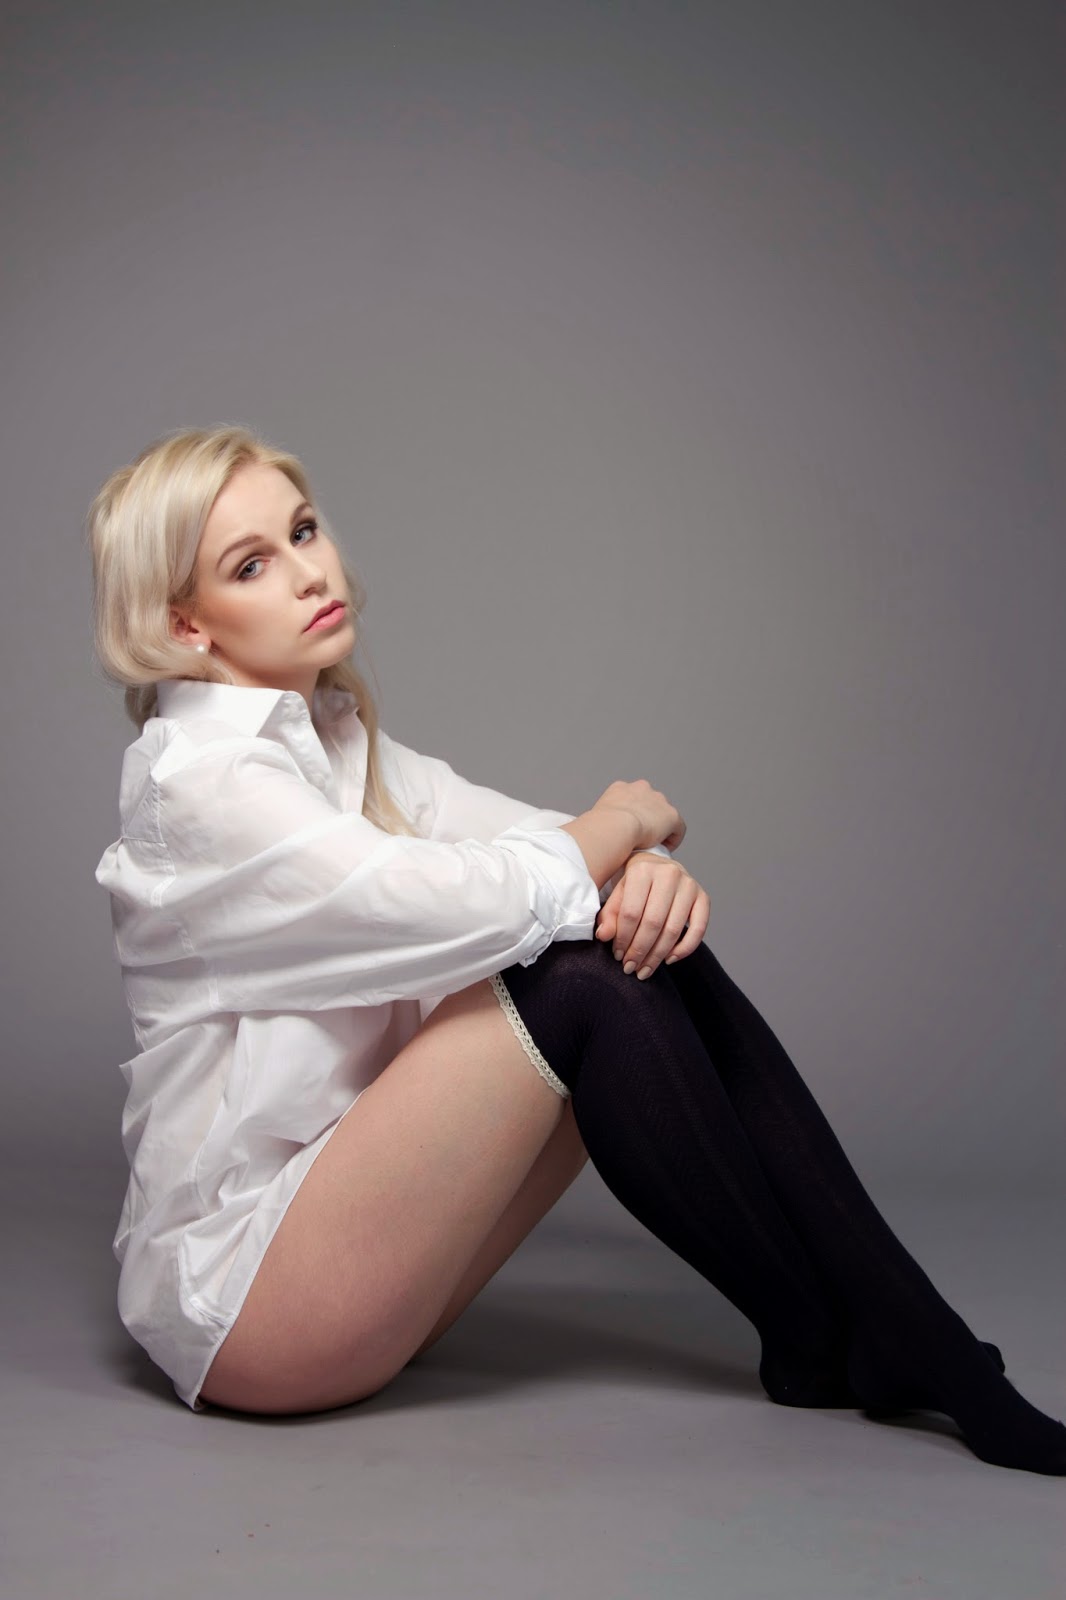


Photo Shoot
Today was the day of my photo shoot. My concept was a clean beauty look with a subtle smoky eye and glossy pink lip. The hair was also meant to be very natural looking. To fit in with this concept I decided to dress my model in a men's dress shirt and long socks. This is a look that is very laid back and therefore fits the slightly messy looking hair but the dress shirt gives it enough of a professional look to justify the immaculate skin and glossy pink lip.
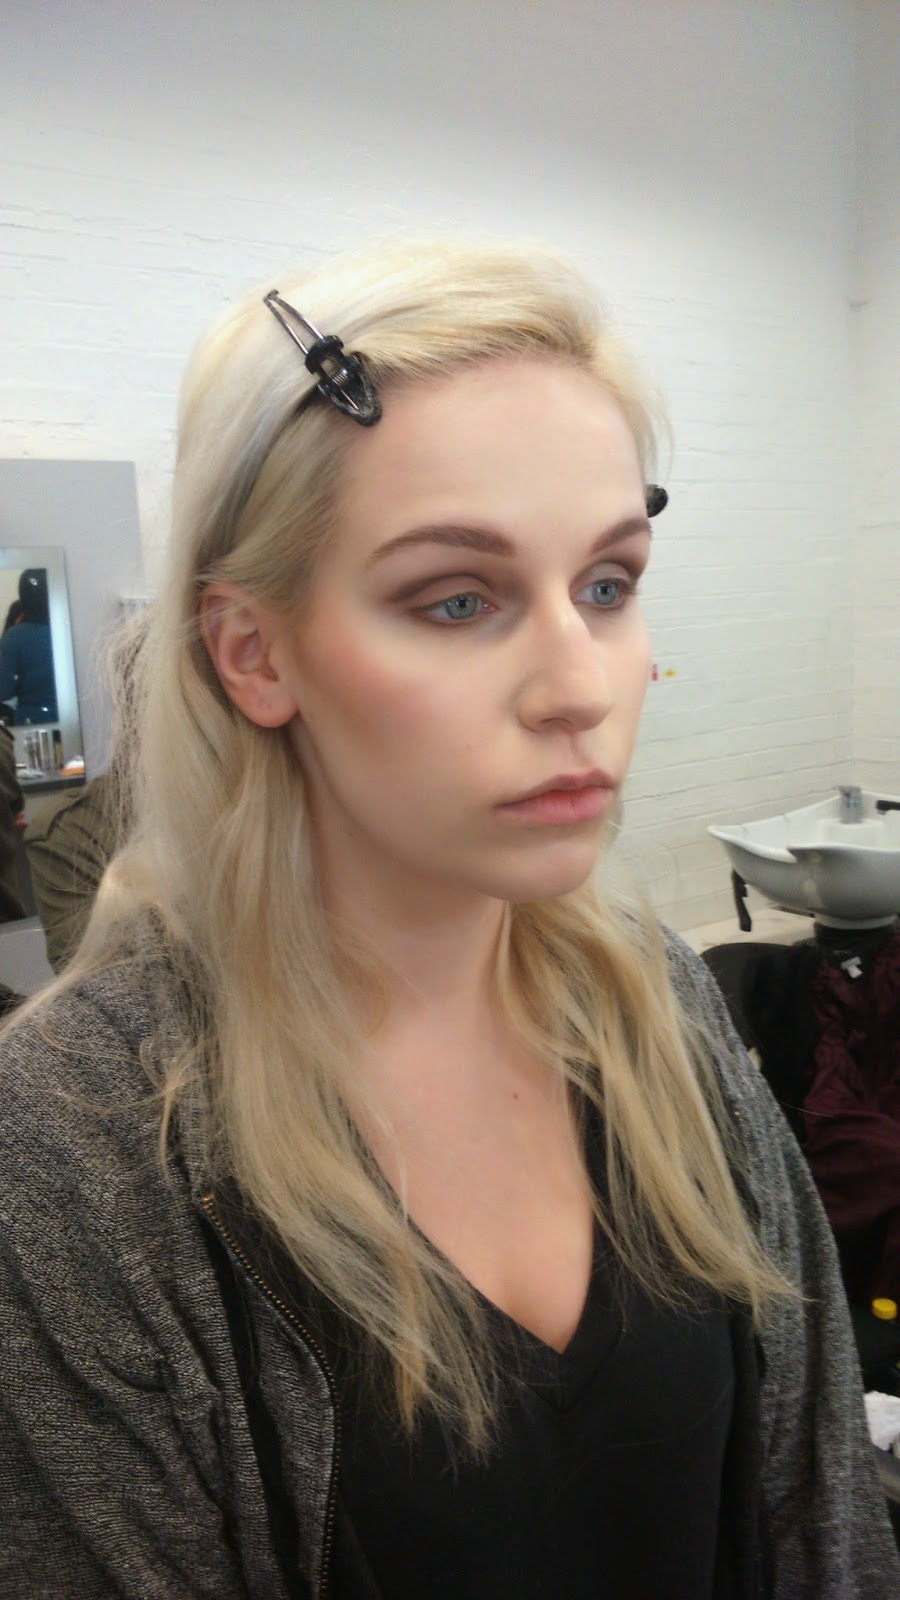
Luckily for me we were shooting in a studio that also had a make-up studio down the corridor. This was good because it meant that I was able to use a high chair so my back was not under any pressure. I was also able to set all my products and equipment up properly and was working under good lighting.
As I wanted the curls in my models hair to be very loose I did this process first so that they would drop. I first applied some heat protection spray to minimise any damage to my models hair and then wrapped sections about an inch wide around the curling wand. I also wrapped the hair loosely around the wand so that I created loose waves. I also wrapped the hair in different directions around the wand so that the waves looked tosseled.
I then moved on eye make-up. I applied the eye-shadow in the same way I had on my second trail But this time I applied a darker colour to the lid for this I used urban decay's 'naked 2'. I then continued with urban decay's 'faint' in the socket line and Ben Nye's 'black brown' to the outer corner. For highlighting the brow bone and centre of the lid I applied Ben Nye's 'shell'. My model bought the product she normally uses for her brows which is Soap and Glory's 'brow archary' this product has a pen application and more liquid formula so it was perfect for mimicking any sparse hairs. I then brush through the brows with brow gel and applied eye liner.This time I was a bit more minimal on the water line.
I then applied my base using the same technique I had in my trial. This time I had bought Mac's face and body foundation in white so the base worked better.
I used the same technique I had for my trail to apply my contour blush and highlight but I went slightly heavier this time so that I would pick up better on camera.
I then applied the lip colour this time using Mac's 'please me' underneath Mac's 'plink' this worked really well and gave me the desired colour.
After I powdered the make-up I went back to hair and added curls where I felt necessary and back combed the hair and the roots to add some lift. I then shook the hair with my fingers slightly to give it a bed head look.
After this we went into the studio and started shooting.
I am really happy with how my shots have turned out and I think that the look tries together really nicely. If I could do anything differently I may add some more texture to the hair. I think my favourite part of the look is the contour as this has photographed really well and is very effective yet subtle.
Luckily for me we were shooting in a studio that also had a make-up studio down the corridor. This was good because it meant that I was able to use a high chair so my back was not under any pressure. I was also able to set all my products and equipment up properly and was working under good lighting.
As I wanted the curls in my models hair to be very loose I did this process first so that they would drop. I first applied some heat protection spray to minimise any damage to my models hair and then wrapped sections about an inch wide around the curling wand. I also wrapped the hair loosely around the wand so that I created loose waves. I also wrapped the hair in different directions around the wand so that the waves looked tosseled.
I then moved on eye make-up. I applied the eye-shadow in the same way I had on my second trail But this time I applied a darker colour to the lid for this I used urban decay's 'naked 2'. I then continued with urban decay's 'faint' in the socket line and Ben Nye's 'black brown' to the outer corner. For highlighting the brow bone and centre of the lid I applied Ben Nye's 'shell'. My model bought the product she normally uses for her brows which is Soap and Glory's 'brow archary' this product has a pen application and more liquid formula so it was perfect for mimicking any sparse hairs. I then brush through the brows with brow gel and applied eye liner.This time I was a bit more minimal on the water line.
I then applied my base using the same technique I had in my trial. This time I had bought Mac's face and body foundation in white so the base worked better.
I used the same technique I had for my trail to apply my contour blush and highlight but I went slightly heavier this time so that I would pick up better on camera.
I then applied the lip colour this time using Mac's 'please me' underneath Mac's 'plink' this worked really well and gave me the desired colour.
After I powdered the make-up I went back to hair and added curls where I felt necessary and back combed the hair and the roots to add some lift. I then shook the hair with my fingers slightly to give it a bed head look.
After this we went into the studio and started shooting.
I am really happy with how my shots have turned out and I think that the look tries together really nicely. If I could do anything differently I may add some more texture to the hair. I think my favourite part of the look is the contour as this has photographed really well and is very effective yet subtle.
 |
| My set up |
 |
| backstage shot in make-up studio |
 |
| Backstage shot in make-up studio |
 |
Back stage shot in studio |
Second Trail Run for Photo shoot
This evening I did a trail run for the photo shoot on my model.
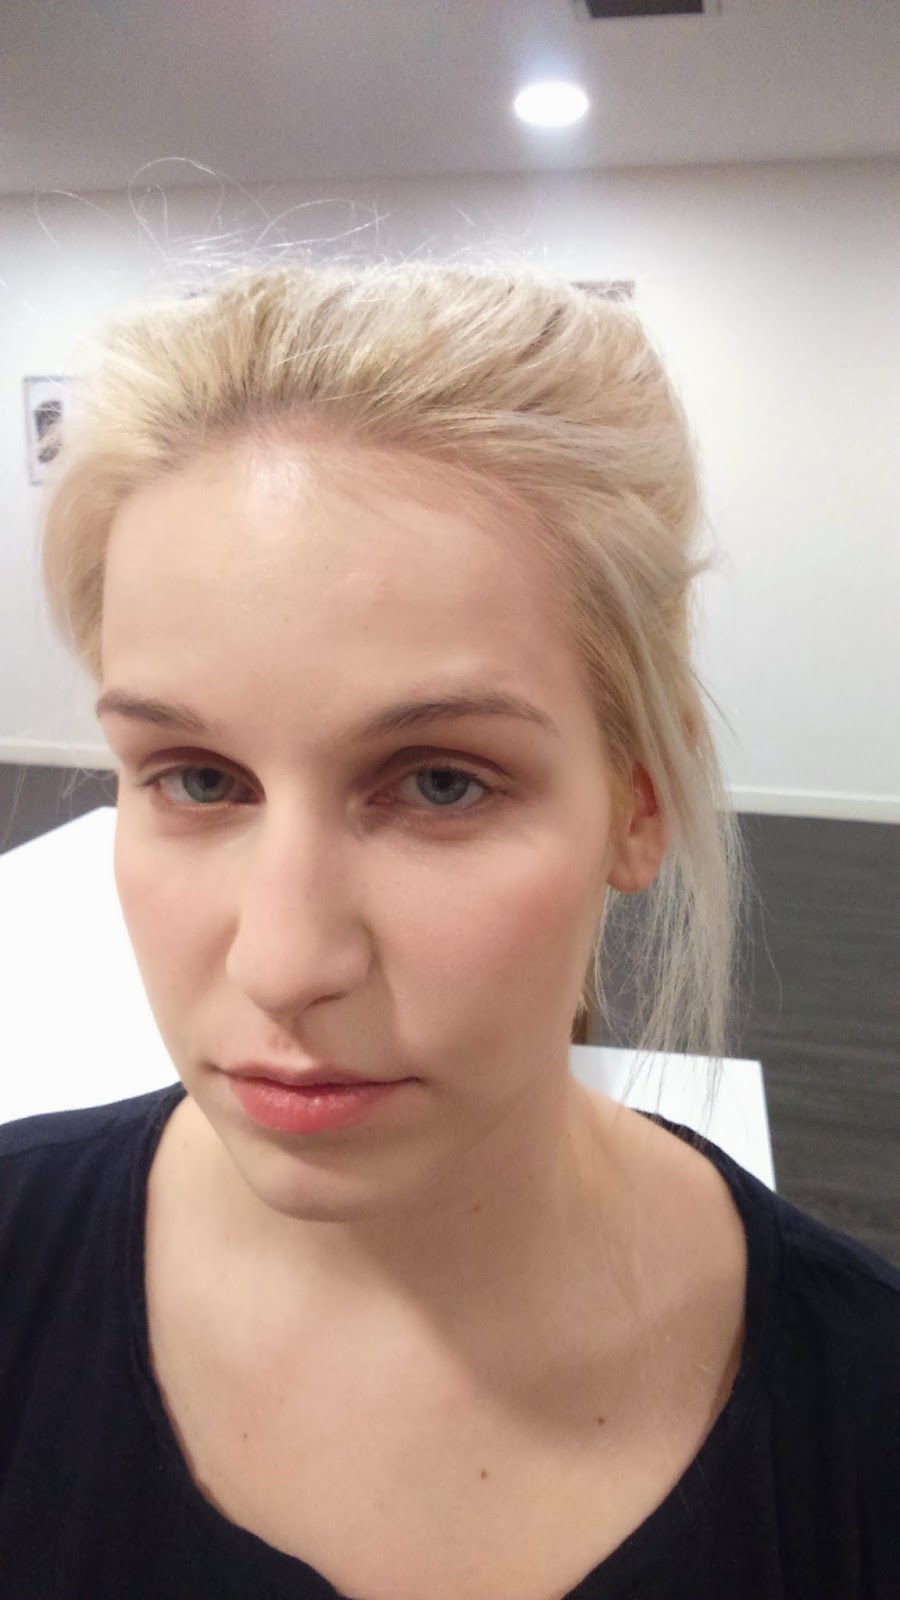
The first thing I did was to apply a base. From my earlier trail I learned that using studio fix was a bit heavy and far too matte as I want the skin to look fresh and dewy yet flawless. To achieve this I started by using my derma colour greasepaint concealer and applied this to any areas of this skin that needed some additional coverage. My model had some redness in her cheeks and nose she also had a small scar on her forehead so I added some derma colour to these areas. I mixed the colour from the pallet but I had to add some white from my super colour pallet due to my model having very fair skin. I applied this using a large eye-shadow brush. I then applied Mac's face and body over the top of this as this foundation leaves the skin with a dewy finish. The colour I have in my kit (C1) was a little dark for my model so I mixed some the white super-colour with this too. This took a very long time to mix so for my shoot I will purchase some face and body foundation in white as this is the same foundation so it will mix perfectly. I then applied some of the d32 colour under my models eyes to cancel out any blue tones. I then applied my previously mixed concealer colour over the top of this.
I then set the base using the Ben Nye loose powder in translucent using a duo fibre brush. This worked well as it set the foundation but did not take away the dewy finish I wanted. All in all I am happy with my base but I feel it will be better when I have purchased the white face and body foundation.
I then moved on to the eye make-up I started off by applying the urban decay primer potion to create a base for the eyeshadow so that it didn't crease or move. For the eye-shadow I changed used brow tones and used lighter tones than in my previous trial. I first applied the colour 'strange' from the urban decay naked 3 pallet and placed this all over the lid. I then applied the colour 'faint' form the urban decay basics pallet and buffed this into the socket line. After this I added some 'brown black' from the Ben Nye pallet to the outer corner and buffed this into the previous colours. I then added the 'shell' colour from the Ben Nye pallet to the centre of the lid and the brow bone as a highlight. For liner I used the l'oreal super liner perfect slim to the top lash line and blended it slightly so it was not a harsh line. I am much happier with this than in my previous trail as it was much thinner. I also added some black eye pencil to the water line only applying it to the outer third of the eye and blending the rest inward to keep a soft look to the eye. My final step for the eye make-up was to apply some of the faint colour to the lower lash line and blend it down so it was not a harsh line and then applied some black brown very tight to the lower lash line and blended this too. I feel that although the shape is correct and the blending is good there is a bit too much contrast with my colours and the socket line is a bit heavy. To rectify this next time I will apply a darker tone to the lid. I also need to apply the eye-shadow first as when the shadow dropped onto my base it became very messy due to the fact that the base was dewy so the shadow just stuck there.
For brows I filled in any sparse areas with Mac's brow pencil and then ran through the brow with a clear brow gel. I think I need to keep the brow a bit more natural for the look I want to achieve so for the shoot I will select a more appropriate product and be less heavy handed.
I then moved on to my contouring. For this I applied a dark ton form my la macaquillage pallet to the hollows of my models cheeks and blended this in. I then applied Mac's blusher in 'peach melba' to the cheeks just above the contour. After this I applied some highlight to the tops of the cheekbones. I used benefit's 'watts up' highlighter this worked really well as it is a cream champagne toned foundation. I am really happy with this part of the make-up but for the shoot I can probably afford to be a bit more heavy with it.
Finally I applied Mac's lipstick in 'plink'. This is a glossy pink tone which reflects the lipstick used in the Tom ford show but with a pinker tone. I like the way this looks but I would like the lips to have a stronger colour pay off for the shoot so I am going to apply Mac's 'please me' first and then add 'plink over top of this.


The first thing I did was to apply a base. From my earlier trail I learned that using studio fix was a bit heavy and far too matte as I want the skin to look fresh and dewy yet flawless. To achieve this I started by using my derma colour greasepaint concealer and applied this to any areas of this skin that needed some additional coverage. My model had some redness in her cheeks and nose she also had a small scar on her forehead so I added some derma colour to these areas. I mixed the colour from the pallet but I had to add some white from my super colour pallet due to my model having very fair skin. I applied this using a large eye-shadow brush. I then applied Mac's face and body over the top of this as this foundation leaves the skin with a dewy finish. The colour I have in my kit (C1) was a little dark for my model so I mixed some the white super-colour with this too. This took a very long time to mix so for my shoot I will purchase some face and body foundation in white as this is the same foundation so it will mix perfectly. I then applied some of the d32 colour under my models eyes to cancel out any blue tones. I then applied my previously mixed concealer colour over the top of this.
I then set the base using the Ben Nye loose powder in translucent using a duo fibre brush. This worked well as it set the foundation but did not take away the dewy finish I wanted. All in all I am happy with my base but I feel it will be better when I have purchased the white face and body foundation.
I then moved on to the eye make-up I started off by applying the urban decay primer potion to create a base for the eyeshadow so that it didn't crease or move. For the eye-shadow I changed used brow tones and used lighter tones than in my previous trial. I first applied the colour 'strange' from the urban decay naked 3 pallet and placed this all over the lid. I then applied the colour 'faint' form the urban decay basics pallet and buffed this into the socket line. After this I added some 'brown black' from the Ben Nye pallet to the outer corner and buffed this into the previous colours. I then added the 'shell' colour from the Ben Nye pallet to the centre of the lid and the brow bone as a highlight. For liner I used the l'oreal super liner perfect slim to the top lash line and blended it slightly so it was not a harsh line. I am much happier with this than in my previous trail as it was much thinner. I also added some black eye pencil to the water line only applying it to the outer third of the eye and blending the rest inward to keep a soft look to the eye. My final step for the eye make-up was to apply some of the faint colour to the lower lash line and blend it down so it was not a harsh line and then applied some black brown very tight to the lower lash line and blended this too. I feel that although the shape is correct and the blending is good there is a bit too much contrast with my colours and the socket line is a bit heavy. To rectify this next time I will apply a darker tone to the lid. I also need to apply the eye-shadow first as when the shadow dropped onto my base it became very messy due to the fact that the base was dewy so the shadow just stuck there.
For brows I filled in any sparse areas with Mac's brow pencil and then ran through the brow with a clear brow gel. I think I need to keep the brow a bit more natural for the look I want to achieve so for the shoot I will select a more appropriate product and be less heavy handed.
I then moved on to my contouring. For this I applied a dark ton form my la macaquillage pallet to the hollows of my models cheeks and blended this in. I then applied Mac's blusher in 'peach melba' to the cheeks just above the contour. After this I applied some highlight to the tops of the cheekbones. I used benefit's 'watts up' highlighter this worked really well as it is a cream champagne toned foundation. I am really happy with this part of the make-up but for the shoot I can probably afford to be a bit more heavy with it.
Finally I applied Mac's lipstick in 'plink'. This is a glossy pink tone which reflects the lipstick used in the Tom ford show but with a pinker tone. I like the way this looks but I would like the lips to have a stronger colour pay off for the shoot so I am going to apply Mac's 'please me' first and then add 'plink over top of this.
 |
| My base |
 |
| My Base |
Bow
In today’s lesson we looked at cage work this is something you use as a frame work and cover it in hair. Cages can be made out of skrim and wire.
Today we worked on creating a bow to add to the hair. I created this bow by using a cardboard template and covered this in weft. I found this process very tricky as the hair I was using was not of the best quality and therefore my final shape ended up having some loose hairs coming off it.
I then pinned this into my models hair this worked fairly well. If my structure had been bigger I would have needed to create a loop of add some netting to the bottom of my structure in order to make it secure to the hair.
I then added the bow to a bun I had created in the hair by pinning it in using grips which I managed to hide pretty well.


Today we worked on creating a bow to add to the hair. I created this bow by using a cardboard template and covered this in weft. I found this process very tricky as the hair I was using was not of the best quality and therefore my final shape ended up having some loose hairs coming off it.
I then pinned this into my models hair this worked fairly well. If my structure had been bigger I would have needed to create a loop of add some netting to the bottom of my structure in order to make it secure to the hair.
I then added the bow to a bun I had created in the hair by pinning it in using grips which I managed to hide pretty well.
Subscribe to:
Posts (Atom)