Today was the day of my photo shoot. My concept was a high fashion make-up to represent the Greek goddess Hera with an eighties inspiration . The hair was based off of a statue of Hera but with an eighties crimp. To fit in with this concept I decided to dress in a strapless top to give a nude look with bronzed skin.
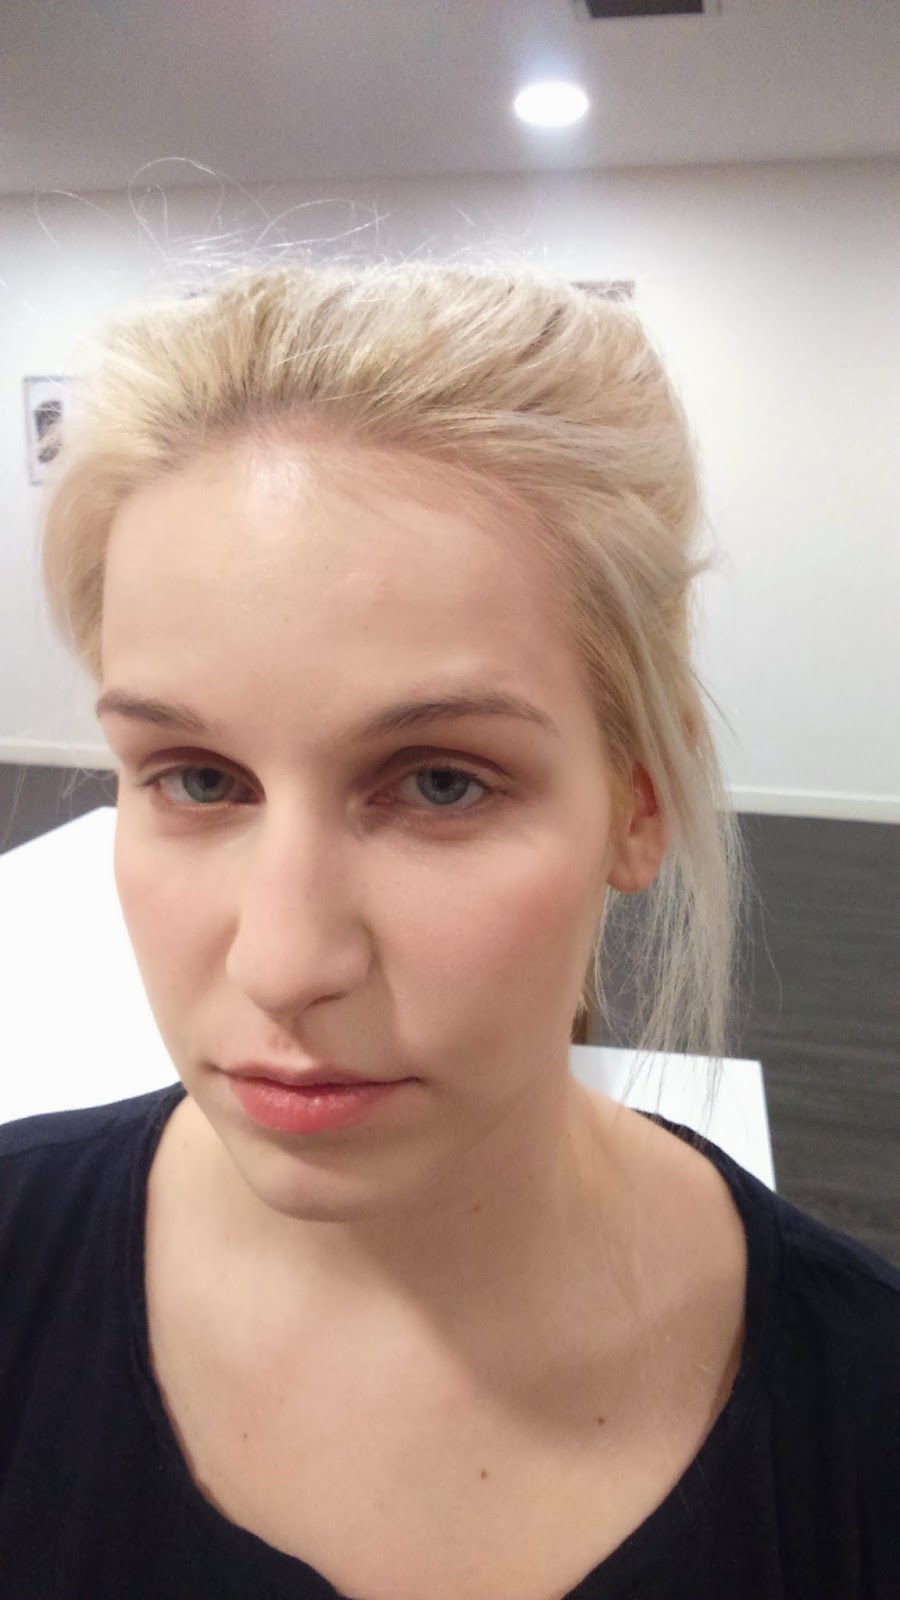
As I wanted my models hair to be on a middle parting I started but setting it in rollers on a middle part just taking the two front sections. Before doing this I put some setting spray into my models hair so that it would hold better.
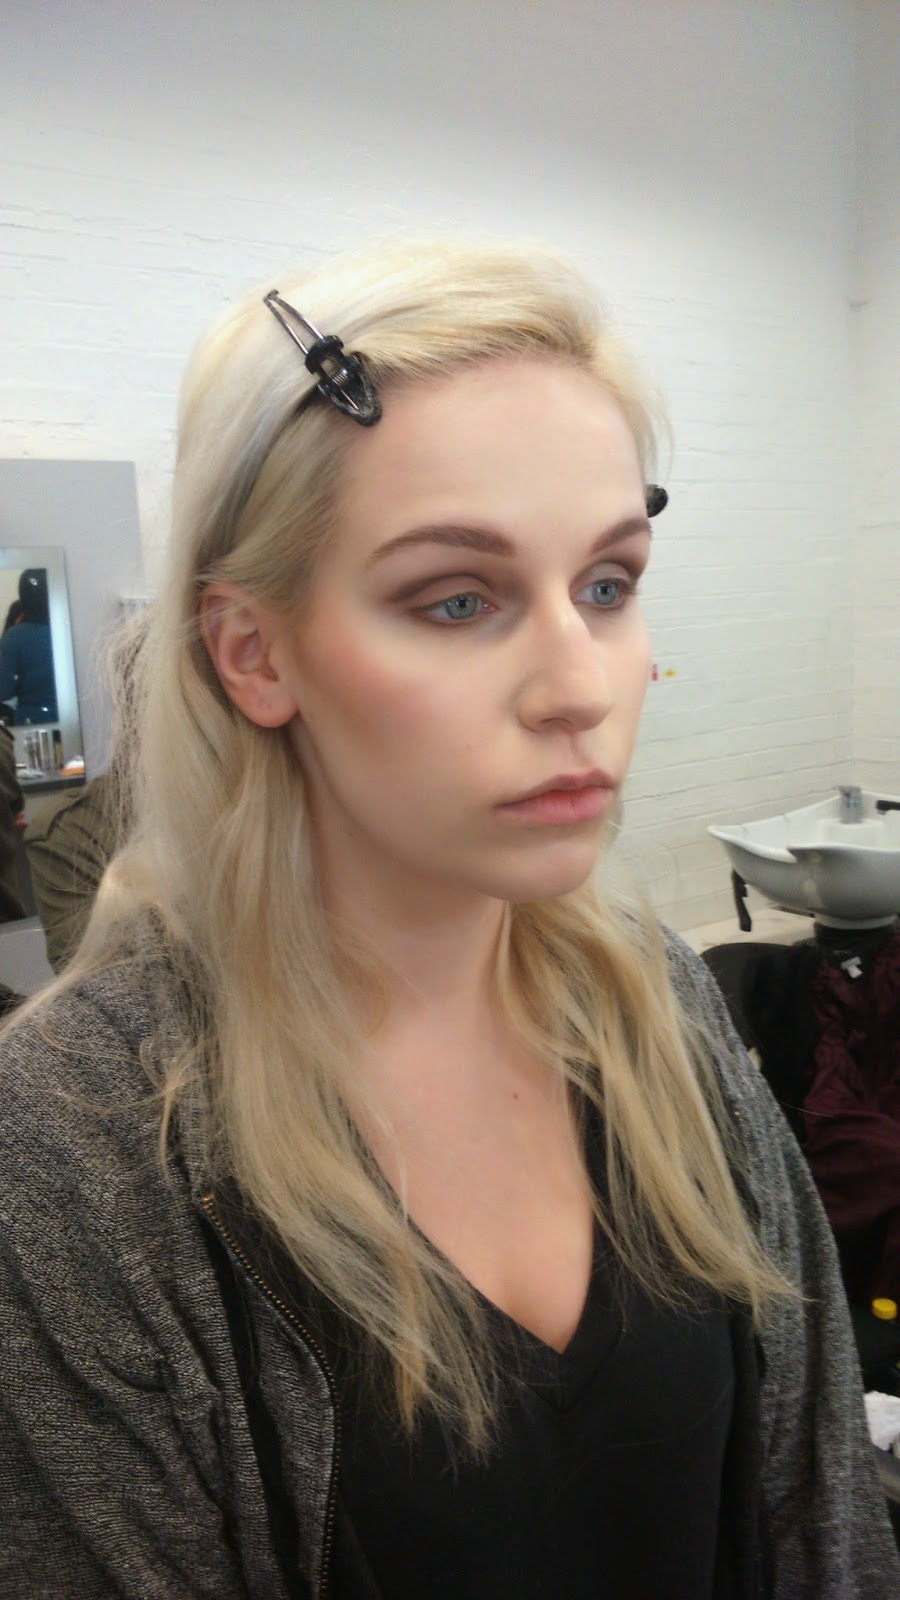
I then moved on eye make-up. I applied the eye-shadow in the same way I had on my third trail. But this time I took the blue colour from my Revolution pallet slightly higher than I had previously. I also added a very pale green from my revolution pallet as a highlight under my models brow bone. I found that when I blended the colours together the teal got a little bit lost and so I had to go back in a re-establish this.
I then applied my base using the same technique I had in my trial. This time I used Clarins skin illusion foundation mixed with plenty of 'Sun Beam'. This is a medium coverage satin finish foundation so it mixed really nicely with sun beam and gave me the perfect base.
I used the same technique I had for my trail to apply my contour using a darker tone from my la maquillage pallet and being sure to blend well. I then added the lilac shadow as I had in my trail to the contour. This time I used Mac's soft and gentle for highlighter which worked much better as it's a lighter tone.
I then applied the lip colour exactly as I had in trials only this time I mixed clinic's 'grape' lipstick with the Mac 'up the amp' as this lipstick has a slight sheen to it.
I then took my models hair out of the rollers and crimped all of my models hair. I did this in sections regrettably due to a fire alarm the crimping was a bit inconsistent and struggled a little bit with getting the same sized sections. I then went in with the crimper at the roots of the hair as in some places I got gotten nice and close and others I had left a section straight. I then created my twists I did this by pulling the front section of the hair back and making a rope with it and securing it with a hair pin through the centre of the rope to conceal them. When my teacher came and checked my hair she pointed out that my middle parting was not straight and I think that's something that really let me down. I also achieved a lovely shape with my twist on one side but not the other we discovered that this was because the side that had the nice shape had been twisted up first and the side the other side I had twisted downwards first so I quickly rectified that. My teacher also noticed that the hair had a bit of separation in the back. Due to the crimping all it took was a quick comb to fix this.
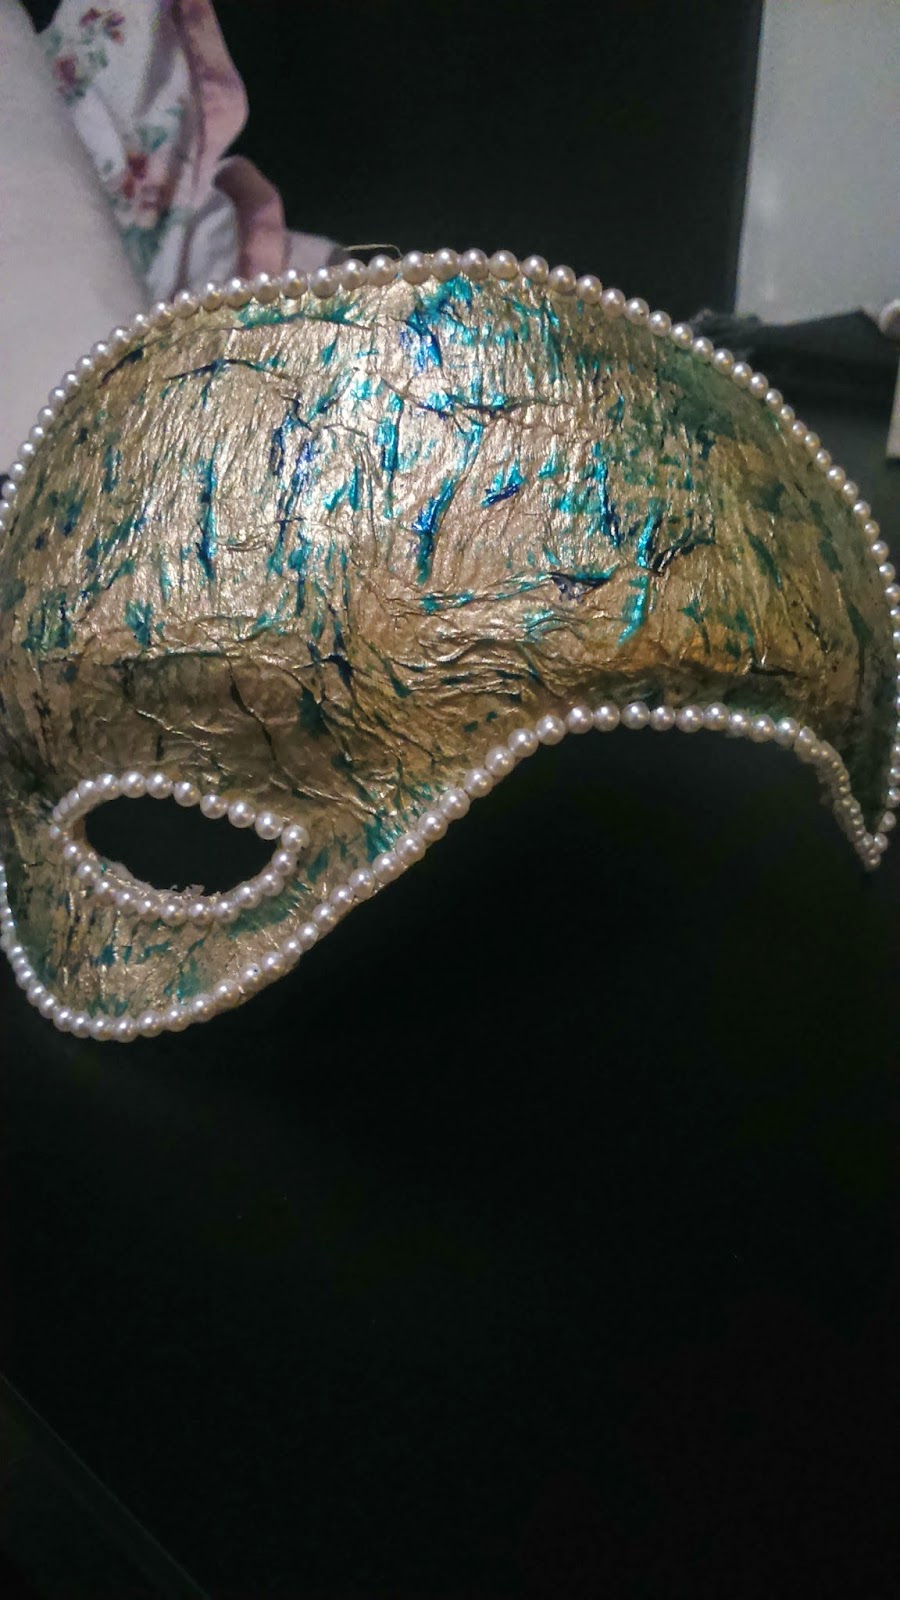
My very last step was to bronze my models chest and place the peacock feather in her hair. Overall I am very happy with my look. I think something that lets me down is the fact that my middle parting is not straight as your eye is drawn to it.
Wednesday, May 20, 2015
References.
http://www.cosmopolitan.co.uk/beauty-hair/beauty-trends/news/g3648/spring-summer-2015-hair-makeup-trends/?slide=6
http://fashion.telegraph.co.uk/galleries/TMG10309701/23/London-Fashion-Week-J.W.-Anderson-springsummer-2014-in-pictures.html
http://www.cosmopolitan.com/style-beauty/beauty/news/a21458/beauty-trends-of-1980s/
http://fashion.telegraph.co.uk/galleries/TMG10309701/23/London-Fashion-Week-J.W.-Anderson-springsummer-2014-in-pictures.html
Pagan Influence In Fashion
A fashion show I have researched is the J.W Anderson SS14 collection that was shown at London fashion week in 2013.
You can see the pagan influence in the clothing with the straight cuts and chunky knits.
The hair has been kept fairly simple in that it is parted on the middle and quite simply styled. The make-up is also fairly neutral with brushed up brows.
One reported has drawn on the pagan influence saying 'Folded and basked weave leathers were cut on the cross. As the models strode down the catwalk in their throat-lapping sheaths and calf length skirts they sometimes looked like a human extension of the parquet flooring. That's not to say there weren't some heart-stopping pieces, because there were.'
Final Project
For our final project we were given four themes to base a look upon. They are, Pagan, Day of the dead, Tribal and Masquerade balls of King Louis XIV. I have chosen Pagan as my theme.
Paganism is any religion that has more than one god. Through my research I have learnt about the Ancient Greek Gods and Goddesses and decided this is where I am going to take my inspiration from. Out of all the Greek goddesses the one I am the most drawn to is Hera.
Hera is wife of Zeus who is king of the gods therefore I will incorporate some regal colours into my make-up. An animal that is sacred to her is the peacock, this gives me the opportunity to play with colours I would not normally use.
I will be doing some practise and research help me create my look but as it stands now I think I would like to create a look that features a clean dewy base with some gold shimmer, A statment eye using peacock colours and a gold lip.
For hair my first thought like was to create a low Grecian bun similar to the one I created in a previous lesson. However having seen a statue of Hera I feel it would be better to give the hair a wave and pin it back in a similar way to hers on the statue.
Year 1 Evaluation
The first year of my higher national diploma at West Thames college has been a lot more full on than I expected. When I chose the course I had no idea how many projects I would be given or how many different styles of make-up I would cover. I was also completely unaware of the fact that I would also study history and art. Something else that was unexpected was the emphasis on hair. I have learnt a lot over the duration of my first year and realised that I will need to start making connections over the summer in order to give myself a stepping stone into the working world at the end of year two.
The first unit we covered this year was make-up and hair spanning from the Victorian Era up until pre world war one. I found the make-up lessons in this unit interesting in that a lot of products that would be essential for most women today, like mascara, were not used during this time period and if they were it was a very minimal amount. I did find that these lessons became a bit repetitive as the make-up was fairly similar throughout this time period. The hair section of this unit I also found very interesting. To me what was so fascinating is that even though women of today have a lot more technology out day to day hairstyles tend to be much simpler. Hair was something I really struggled with and at the beginning of the year I felt completely out of my depth. I had never even used a roller before our first class so I found it really hard to then have to create an elaborate hairstyle and I came away from nearly every class feeling incredibly deflated. I think this was reflected in my final image. I found the history section of this unit really enjoyable although I did find it a bit inconsistent. I had so many notes for the Victorian era that I was five times over the word limit on my essay, but with the pre world war one section of the unit I received far less information.
The next unit to discuss followed the same format as the first one but this time we looked at make-up and hair spanning from the nineteen twenties to the nineteen sixties. I found this unit more relatable as there are film stars and singers from these era’s whose performances we can see. I found the make-up from the nineteen twenties and thirties more challenging that what we had done previously as blocking out eyebrows is something I am not very confident with. I really enjoyed nineteen forties and nineteen fifties make-up as it was at this time my grandmother and her sister were in their twenties and thirties and they were probably the most glamorous women I knew. I also really enjoyed the sixties as the is decade in which most of my favourite bands and musicians rose to fame and the generation that people who know me say I should have been born in. I again struggled with hair in this unit I don’t think I have achieved anything to be particularly proud of although I did get used to the tools more. I also really enjoyed the history lessons in this unit coming from a countryside town where children were evacuated to during world war two and being of English and Caribbean descent it was really interesting to hear the historical context behind my grandparents and older relatives stories of the time. My only wish is that we had covered the sixties, but that’s probably just me personally due to my love of music from the decade.
The theatre unit was probably my favourite. Having studied acting for ten years it held the most personal interest for me. Having said that it was the unit I found the most challenging, I don’t think there was any look that I was one hundred percent happy with form the unit. My favourite lesson from this unit was creating injuries and this has made me really excited to study special effects fully next year. I enjoyed doing the research for this unit due to my interest in the theatre. At the moment theatre is where I am thinking I would like to end up. There are still a couple of looks from this unit that I need to perfect.
My fashion unit was the one I was the most nervous about seeing as I do not follow fashion and would not consider myself a particularly fashionable person but I ended up really enjoying it. Being honest I did find the first few make-up and hair lessons a bit tedious as it was covering the basics but I understand that we need this as a basis move on to the more advanced make-up and hair. Out of all the units I feel that fashion is where I have created the looks I am the most proud of, possibly because I’ve been able to create a look myself and have some level of creative control. I really enjoyed putting my shoot together and this is probably the make-up that I am the most proud of from the year. I also find the blog the easiest and best way to present my work. I wish all units could be submitted on a blog.
Overall I feel it has been a good experience and I have grown a lot as an artist. I am really looking forward to being able to be more creative next year and improve and expand upon the skills I have built this year. I know that we have less projects next year as well so I am going to try and gain experience where possible.
Final Practise
Today I did my final practise prior to my assessment.
I followed all the same steps as before with a few slight changes.
The first change I made was to work on balancing. This time I managed to get my balance right I also made sure to blend the colours better as I noticed from my photo on my last practise that the gold and teal had a slightly too obvious line between the colours so I made sure to blend that this time.
The other thing was worked on was my my contour slightly more subtle and finding a more appropriate coloured highlighter for this I applied extra sun beam to the high points of the face. This worked better than the eye-shadow but I still feel that I need something a tiny bit paler so I think for the assessment I will use Mac's soft and gentle.
My model has sparser eyebrows than my classmate whom I have previously practised on so I filled her brows lightly using a Mac eyebrow pencil.
Second Practise
For my second practise I decided to implement some of my research into 80's make-up so I have started to use multiple colours on the eyes and add some colour to the contour which I learned I need to add from my last practise.
I still wanted to incorporate the gold colour to my make-up so I started by applying this to the inner third of the eye purposefully taking the colour around the inner corner. I knew that this time I wanted to add some more colours to the eye so I added a teal colour from my Revolution pallet to the centre of the eyelid and applied the blue that I used in my last practise and created sharp edge on the outer corner of the eye taking it into the crease. I preferred this look but I felt the crease needed a bit more definition so therefore I added some of the lilac tone to the crease. I also added some dark purple from my Revolution pallet to the lash line I kept this fairly subtle as the rest of the colours were so strong.
I then followed my previous method of adding 'Sun Beam' to foundation but this time I used Illamasqua 'skin base'. This created a nice finish to the skin. To conceal any bags under the eyes I applied some d32 greasepaint I then applied additional foundation over this. After this I applied some more gold, teal and blue to under the eye matching where the colours were placed on the lid. The model I was worked on had very full brows so I just ran through them with brow gel.
I contoured the face by using a darker foundation. This worked well but I applied a bit to much to the jaw line so it ended up looking a bit muddy in this area. I then highlighted the face using the gold eye-shadow I used previously. This gave a nice golden sheen to the skin but I feel it was a bit too bronze and I need something slightly lighter. I also added a bit of lilac eye-shadow to the cheek contour. I really like the effect that this has given and it is defiantly something I am going to keep.
My final step for the look was the lips. From my previous practise I had learned that the gold lip was not going to work and so I opted for a purple lip instead. For this I used the Mac lipstick in 'up the amp'. After applying this I decided I wanted a subtle ombre lip so I applied some dark purple eye-shadow from the revolution pallet to the outer lip line and blended it in. I liked this look and will keep it for my final piece.
Something I need to work on is my balance. On one eye the pulled outwards more and one side was pulled upwards more. I need to balance this and find a lighter highlighter.
The influence of 1980's Make-up and Fashion
Having looked at fashion through the years I can see that the 80's had some Grecian influence. This is clear from the big shoulder pads and the fact that many of the super models of the time were very athletic looking.
Due to this influence I have decided to take influence for the eighties for my make-up and hair. This includes several colours on the eyes and strong coloured blush or contour and lip. It has also given me inspiration for my hair. I thought I might use rollers or curlers to create soft waves but the eighties inspiration has made me want to crimp the hair.
Crimped hair at Stella McCartney SS15 |
Example of eighties make-up |
First Practise
Today I practised a make-up look on myself using my concept for my final piece.
I started with the eyes. I first applied Urban Decays 'half baked' all over my lid. I chose this colour as it is a true bronze gold and reflective of some of the tones in peacock feathers and quite lavish looking.
I then applied a blue colour from the Revolution 'mermaids vs unicorns' pallet to my crease and blended these two colours enough so there was not a harsh line but not so much that they became one colour. I also applied some of the blue colour to my bottom lash line. I added a champagne tone to my brow bone and inner corner as a highlight, for this I used Urban Decays 'sin'.
For my liner I used Barry Ms waterproof eye pencil in 'bronze' and applied this to my water line to echo the gold tone on the lid. I also used a dark purple eye-shadow also from the Revolution pallet to my top lash line. This didn't work very well as I wanted the colour to be much bolder so on the other eye I experimented with putting a white eye-liner on first and then adding the purple. This make the eye shadow more vibrant but still did not give me the desired effect.
My last step for my eyes was to add a layer of mascara. I don't want to add a fake lash to this look as I feel it will just hide the colours I have used.
For skin I used a medium coverage foundation on my skin but on my models skin I may be able to get away with sheer. On myself I opted for Collections 'lasting perfection foundation' this foundation has a satin finish which is good as I am mixing it with Benefits 'Sun Beam' to give it a golden shimmer. I am really happy with how this has made the skin appear and I will use this method in the final assessment. I then concealed my dark circles using my mac concealer pallet. I need remember to do this before I apply eye-shadow to my bottom lash line as it ended up getting a bit messy.
I then filled my brows I thought I would try this with a shimmery colour. My reasoning for this was that I was creating a character who is a goddess, not human and human does not shimmer. I think this technique may have worked but I chose the colour 'toasted' from the Urban Decay Naked pallet which was too light and ended up looking too unatural.
My final step was to create the gold lip. I don't have a gold lipstick so I improvised by mixing some of the gold eye-shadow I used previously and mixed this with a clear lip balm. I really liked the idea of the gold lip but unfortunately I think with the skin already being very golden I think it was a little but too much. I am going to find an alternative to the gold lip as if I have to sacarafice one of the two I'd rather keep the golden skin.
Although I like this look I don't think it's exactly what I am looking for. I think I need to add some more colours to the eye as right now they are looking Egyptian due to the blue and gold. I also need to add some contour to the face as right now it is looking a bit flat due to all the shimmer.
Tuesday, March 10, 2015
Monday, March 9, 2015
Sunday, March 8, 2015
References
N.p., 2015. Web. 10 Jan. 2015.
N.p., 2015. Print.
N.p., 2015. Print.
N.p., 2015. Web. 9 Feb. 2015.
N.p., 2015. Web. 5 Feb. 2015.
Charlotte Tilbury,. 'TOM FORD SS/15 - Charlotte Tilbury'. N.p., 2015. Web. 9 Jan. 2015.
F.TAPE | The Online Fashion Resource,. 'POP Magazine | Taylor Swift Cover | F.TAPE'. N.p., 2013. Web. 9 Feb. 2015.
http://www.yesstudio.co.uk, designed. 'MAP - News – Tyrone Lebon Shoots Pop Magazine Cover Story'. Mapltd.com. N.p., 2015. Web. 18 Jan. 2015.
Slideshare.net,. 'Dazed &Amp; Confused + I-D Magazine Analysis'. N.p., 2014. Web. 9 Jan. 2015.
Ukjournalism.co.uk,. N.p., 2015. Web. 17 Jan. 2015.
Use, Internet. 'Vogue Homme Japan's Lady Gaga Wearing Meat'. OrlandoSentinel.com. N.p., 2014. Web. 3 Feb. 2015.
Vogue UK,. 'Show'. N.p., 2015. Web. 14 Jan. 2015.
Vogue UK,. 'Show'. N.p., 2015. Web. 1 Feb. 2015.
Vogue UK,. 'Show'. N.p., 2015. Web. 9 Feb. 2015.
Wikipedia,. 'Adele'. N.p., 2015. Web. 1 Feb. 2015.
Wikipedia,. 'Dazed'. N.p., 2015. Web. 19 Jan. 2015.
Wikipedia,. 'Harper's Bazaar'. N.p., 2015. Web. 9 Feb. 2015.
Wikipedia,. 'I-D'. N.p., 2015. Web. 6 Feb. 2015.
Wikipedia,. 'Jennifer Lawrence'. N.p., 2015. Web. 1 Feb. 2015.
Wikipedia,. 'Lady Gaga's Meat Dress'. N.p., 2015. Web. 16 Jan. 2015.
Wikipedia,. 'More Demi Moore'. N.p., 2015. Web. 12 Jan. 2015.
Wikipedia,. 'Nick Knight (Photographer)'. N.p., 2015. Web. 25 Jan. 2015.
Wikipedia,. 'Pat Mcgrath'. N.p., 2015. Web. 1 Feb. 2015.
Wikipedia,. 'Pop (Fashion Magazine)'. N.p., 2015. Web. 8 Jan. 2015.
Wikipedia,. 'Vogue (Magazine)'. N.p., 2015. Web. 1 Feb. 2015.
Photo Shoot
Today was the day of my photo shoot. My concept was a clean beauty look with a subtle smoky eye and glossy pink lip. The hair was also meant to be very natural looking. To fit in with this concept I decided to dress my model in a men's dress shirt and long socks. This is a look that is very laid back and therefore fits the slightly messy looking hair but the dress shirt gives it enough of a professional look to justify the immaculate skin and glossy pink lip.
Luckily for me we were shooting in a studio that also had a make-up studio down the corridor. This was good because it meant that I was able to use a high chair so my back was not under any pressure. I was also able to set all my products and equipment up properly and was working under good lighting.
As I wanted the curls in my models hair to be very loose I did this process first so that they would drop. I first applied some heat protection spray to minimise any damage to my models hair and then wrapped sections about an inch wide around the curling wand. I also wrapped the hair loosely around the wand so that I created loose waves. I also wrapped the hair in different directions around the wand so that the waves looked tosseled.
I then moved on eye make-up. I applied the eye-shadow in the same way I had on my second trail But this time I applied a darker colour to the lid for this I used urban decay's 'naked 2'. I then continued with urban decay's 'faint' in the socket line and Ben Nye's 'black brown' to the outer corner. For highlighting the brow bone and centre of the lid I applied Ben Nye's 'shell'. My model bought the product she normally uses for her brows which is Soap and Glory's 'brow archary' this product has a pen application and more liquid formula so it was perfect for mimicking any sparse hairs. I then brush through the brows with brow gel and applied eye liner.This time I was a bit more minimal on the water line.
I then applied my base using the same technique I had in my trial. This time I had bought Mac's face and body foundation in white so the base worked better.
I used the same technique I had for my trail to apply my contour blush and highlight but I went slightly heavier this time so that I would pick up better on camera.
I then applied the lip colour this time using Mac's 'please me' underneath Mac's 'plink' this worked really well and gave me the desired colour.
After I powdered the make-up I went back to hair and added curls where I felt necessary and back combed the hair and the roots to add some lift. I then shook the hair with my fingers slightly to give it a bed head look.
After this we went into the studio and started shooting.
I am really happy with how my shots have turned out and I think that the look tries together really nicely. If I could do anything differently I may add some more texture to the hair. I think my favourite part of the look is the contour as this has photographed really well and is very effective yet subtle.
My set up |
backstage shot in make-up studio |
Backstage shot in make-up studio |
Back stage shot in studio |
Second Trail Run for Photo shoot
This evening I did a trail run for the photo shoot on my model.
The first thing I did was to apply a base. From my earlier trail I learned that using studio fix was a bit heavy and far too matte as I want the skin to look fresh and dewy yet flawless. To achieve this I started by using my derma colour greasepaint concealer and applied this to any areas of this skin that needed some additional coverage. My model had some redness in her cheeks and nose she also had a small scar on her forehead so I added some derma colour to these areas. I mixed the colour from the pallet but I had to add some white from my super colour pallet due to my model having very fair skin. I applied this using a large eye-shadow brush. I then applied Mac's face and body over the top of this as this foundation leaves the skin with a dewy finish. The colour I have in my kit (C1) was a little dark for my model so I mixed some the white super-colour with this too. This took a very long time to mix so for my shoot I will purchase some face and body foundation in white as this is the same foundation so it will mix perfectly. I then applied some of the d32 colour under my models eyes to cancel out any blue tones. I then applied my previously mixed concealer colour over the top of this.
I then set the base using the Ben Nye loose powder in translucent using a duo fibre brush. This worked well as it set the foundation but did not take away the dewy finish I wanted. All in all I am happy with my base but I feel it will be better when I have purchased the white face and body foundation.
I then moved on to the eye make-up I started off by applying the urban decay primer potion to create a base for the eyeshadow so that it didn't crease or move. For the eye-shadow I changed used brow tones and used lighter tones than in my previous trial. I first applied the colour 'strange' from the urban decay naked 3 pallet and placed this all over the lid. I then applied the colour 'faint' form the urban decay basics pallet and buffed this into the socket line. After this I added some 'brown black' from the Ben Nye pallet to the outer corner and buffed this into the previous colours. I then added the 'shell' colour from the Ben Nye pallet to the centre of the lid and the brow bone as a highlight. For liner I used the l'oreal super liner perfect slim to the top lash line and blended it slightly so it was not a harsh line. I am much happier with this than in my previous trail as it was much thinner. I also added some black eye pencil to the water line only applying it to the outer third of the eye and blending the rest inward to keep a soft look to the eye. My final step for the eye make-up was to apply some of the faint colour to the lower lash line and blend it down so it was not a harsh line and then applied some black brown very tight to the lower lash line and blended this too. I feel that although the shape is correct and the blending is good there is a bit too much contrast with my colours and the socket line is a bit heavy. To rectify this next time I will apply a darker tone to the lid. I also need to apply the eye-shadow first as when the shadow dropped onto my base it became very messy due to the fact that the base was dewy so the shadow just stuck there.
For brows I filled in any sparse areas with Mac's brow pencil and then ran through the brow with a clear brow gel. I think I need to keep the brow a bit more natural for the look I want to achieve so for the shoot I will select a more appropriate product and be less heavy handed.
I then moved on to my contouring. For this I applied a dark ton form my la macaquillage pallet to the hollows of my models cheeks and blended this in. I then applied Mac's blusher in 'peach melba' to the cheeks just above the contour. After this I applied some highlight to the tops of the cheekbones. I used benefit's 'watts up' highlighter this worked really well as it is a cream champagne toned foundation. I am really happy with this part of the make-up but for the shoot I can probably afford to be a bit more heavy with it.
Finally I applied Mac's lipstick in 'plink'. This is a glossy pink tone which reflects the lipstick used in the Tom ford show but with a pinker tone. I like the way this looks but I would like the lips to have a stronger colour pay off for the shoot so I am going to apply Mac's 'please me' first and then add 'plink over top of this.
My base |
My Base |
Bow
In today’s lesson we looked at cage work this is something you use as a frame work and cover it in hair. Cages can be made out of skrim and wire.
Today we worked on creating a bow to add to the hair. I created this bow by using a cardboard template and covered this in weft. I found this process very tricky as the hair I was using was not of the best quality and therefore my final shape ended up having some loose hairs coming off it.
I then pinned this into my models hair this worked fairly well. If my structure had been bigger I would have needed to create a loop of add some netting to the bottom of my structure in order to make it secure to the hair.
I then added the bow to a bun I had created in the hair by pinning it in using grips which I managed to hide pretty well.
Subscribe to:
Posts (Atom)